Visualizing SDF in Blender
Colorcoding distance to the object with Blender Geometry Nodes
TLDR: jump to Geometry Node
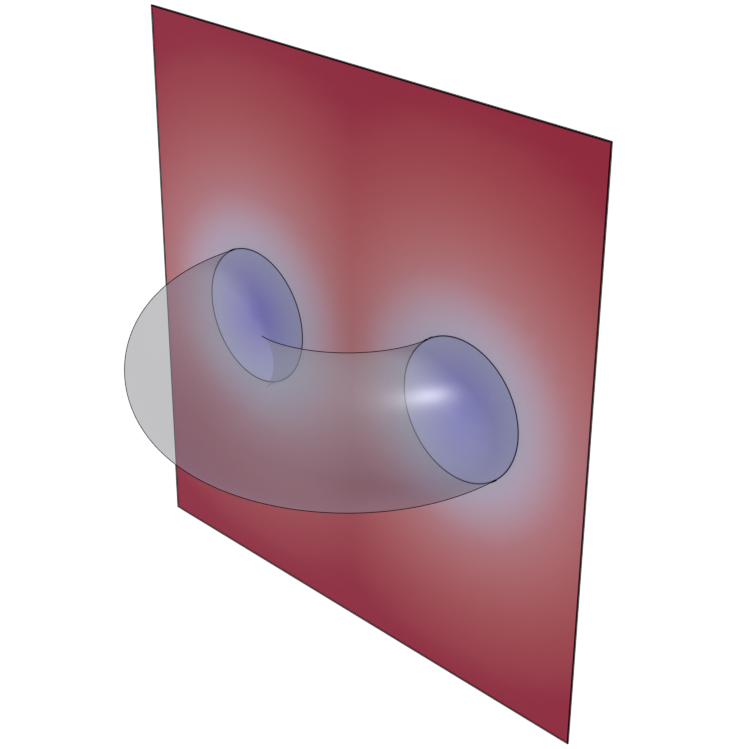
Visualizing SDF in Blender. Normally, one would use KBD-tree to process input mesh and compute SDF value for any query point. We don’t want that, we want something interactive, simple, and in directly Blender - come and meet the Geometry Nodes!
We will use Vertex Color Attribute to store color properties for each vertex in the cross-section plane. And Color Attribute is computed on-the-go with Geometry Nodes.
Setting up a scene
We want to view SDF values for Torus on Plane cross-section. You can use any “cross-section” surface really, as long as it has enough vertices so it looks nice (mesh colors will be interpolated by per-vertex color attribute). For default Plane object in Blender you need to subdivide it: Tab to get to edit mode, then F3 to search and use mesh.subdivide operation.

Setting up color attribute
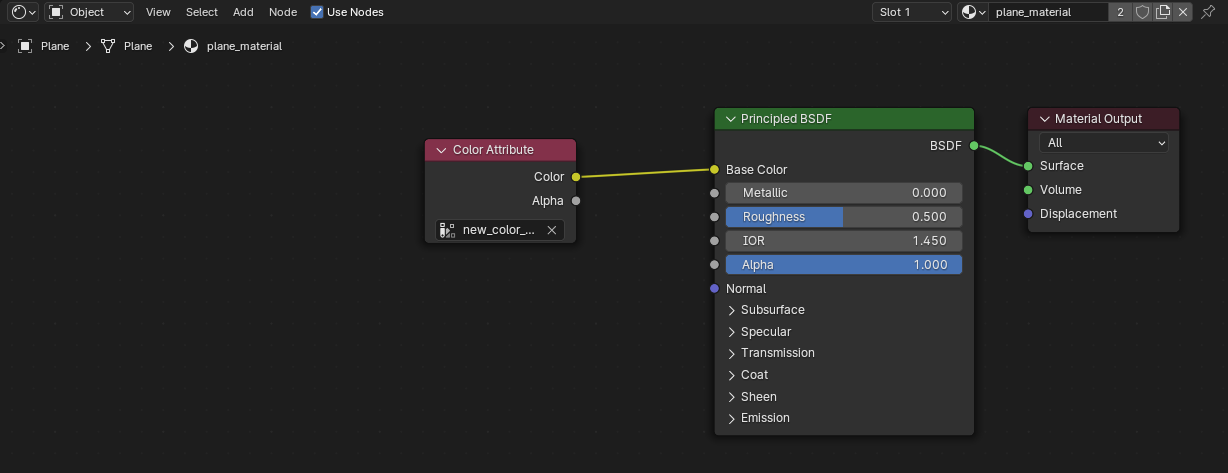
In Object Data menu create new Color Attribute (I name it new_color_attribute here). Then make sure your Material BSDF takes this color attribute as mesh vertex color

Geometry node
Now we fill values of the color attribute using Geometry Node. In Modifiers menu create a new Geometry Node and fill it with these nodes:

Geometry Node design is pretty self-explanatory: for each vertex Position we compute distance with Geometry Proximity node, then map this distance value to Color Ramp with Map Range, and write the color to new_color_attribute.
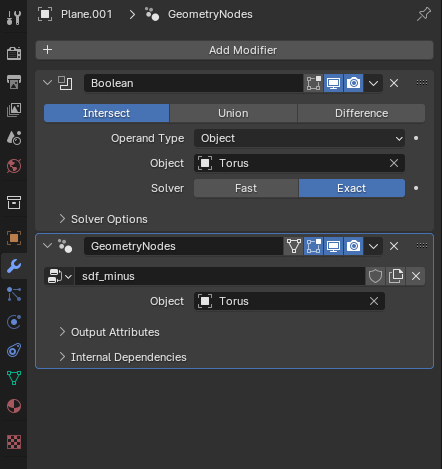
Don’t forget to fill the Object input field in Modifier info as shown here:

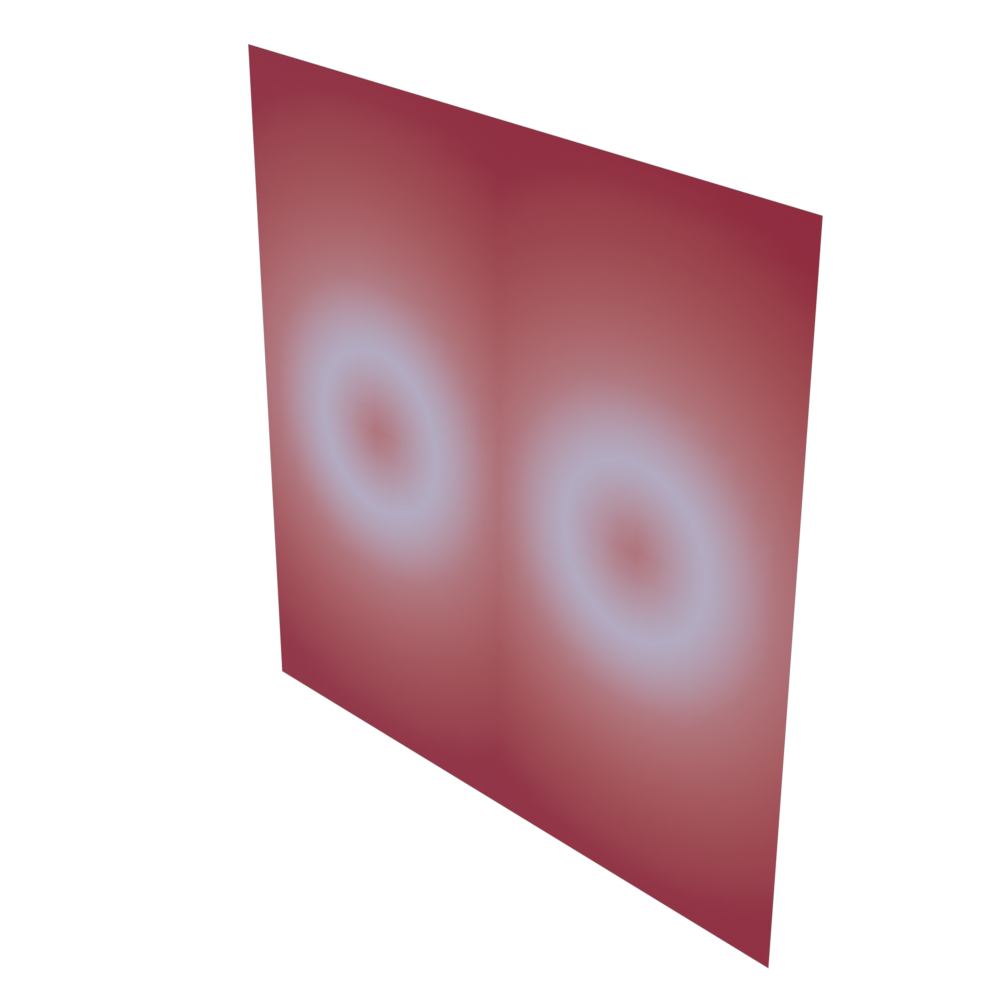
We now have something like this:
“Signed” distance value
Well, we don’t have “signed” values, do we? I haven’t found a way to fix this with Geometry Nodes, but we can do it much simpler: just copy the node and create the same one for the “inside” portion of visualization (negative values) and change the colors.

We then use boolean operations to get the “inner” and “outer” part. Duplicate existing plane and use Intersect boolean modifier Intersect. Do the same for the first plane, but taking the Difference instead.
Tip: select both planes and hit Ctrl + P to build a hierarchy which preserves transformations (Keep Transform). This will help with animating the plane later.

Now you get something like the top figure. You can play with color ramp, lights and shade to make it better. Blender Freestyle overlay may help with volume, and Toon Shader is nice to flatten out the shape.

Animation with keyframes
We can put keyframes on plane position and animate its movement. Once rendered, compose a video file from png images with:
ffmpeg -framerate 12 -i anim_sdf/%4d.png -c:v libx264 output.mp4
More Posts
Here are some more articles you might like to read next: